
Need a walkthrough for Act 5 in Scorn? You've come to the right place! In this Scorn guide, we'll reveal how to complete the puzzles in Act 5, and we've also provided images to help you along the way. In Scorn, this part of the game is known as "Act V", which you'll notice when you go into the save game screen.
This Act 5 walkthrough will also reveal how to beat the final boss in Scorn. Let's get started!
Scorn: Act 5 Walkthrough
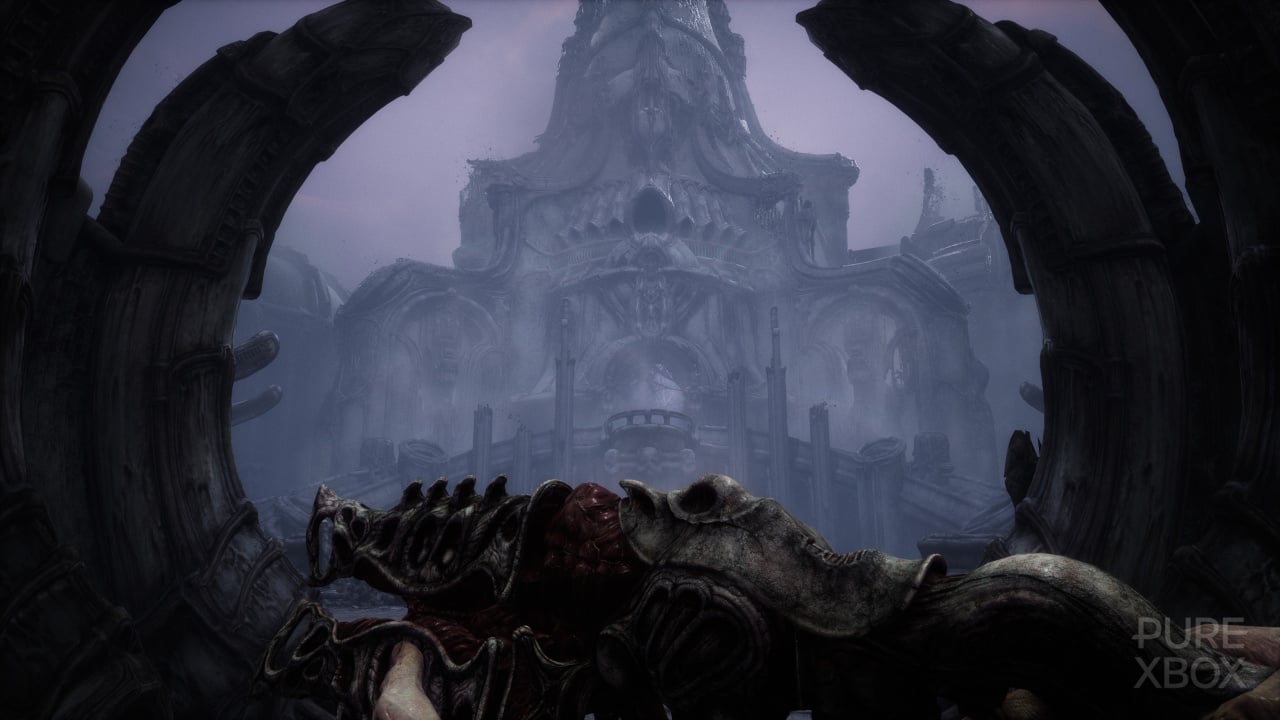
The final act of the game sees you disembark the train that whisked you out of Act IV at a huge cathedral-esque building, as shown below. There’s a few paths off to different levels here but we want to head directly up and through the main entrance for now.
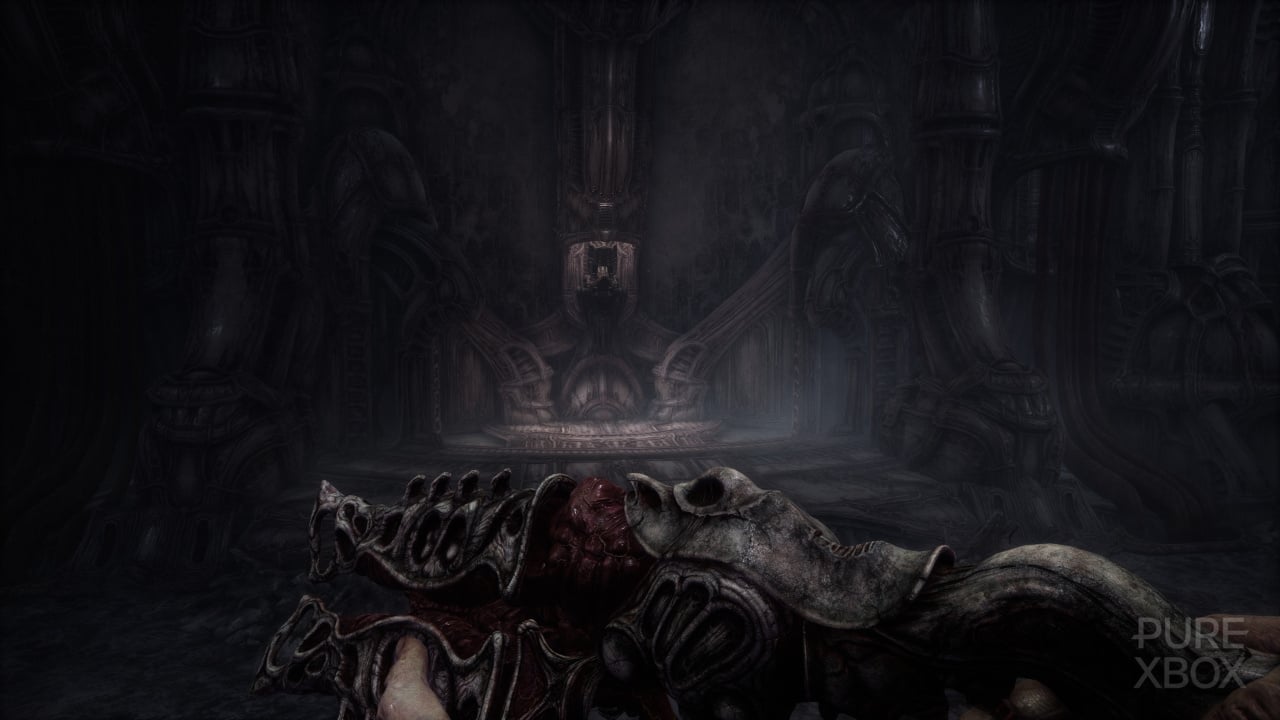
Once inside you’ll come face to face with the rather disturbing contraption we’ve pictured below. From here you’ve got stairs winding up behind to a higher level and doorways with steps down to your immediate left and right. The right side steps are broken, so we want to head on down the left stairway for now.
There are two levels heading down these steps and we want to get off at the upper one, as the lower has nothing for us right now besides a console that will damage our health that we don’t need to interact with just yet.
On the uppermost entrance on the stairs you’ll come to a room with two bodies hooked up to machinery. We want to interact with the right side body first to grab a container that’s currently half filled with blood. Now head off down the corridor straight ahead of you.
Down here you’re going to come to a machine into which you need to insert your container of blood. Once you do this the gate here will slide across. Head on through here and you’ll find yourself in a large room with two cages in the middle, an automaton over to the left and consoles for refilling your health and ammo.
Get yourself all filled up and healthy and then turn your attention to the two red embryos sat on a pillar here. Let’s go ahead and take one of these and bring it over to insert into the automaton on the other side of the room. Once it’s locked into position you need to shoot the embryo twice, once to shatter its protective case and again to kill it and have it spill onto the floor. Pretty gross. Now grab the dead embryo and take it back out to the console where we inserted our container.
The console will now crush the embryo and fill your container to the top with blood. We can now take this full container back to the body in the previous area and plug it in. Once this is done the left body console will become accessible, so let’s take the container from here and head back to the room with the automaton to fill this container, which is currently entirely empty.
Now before we do anything else here, make sure you’ve got your health topped up and all guns reloaded as we’re about to have a boss battle of sorts! Grab the next red embryo and insert it into the automaton. When you do this you’ll be knocked to the ground and a battle commences.
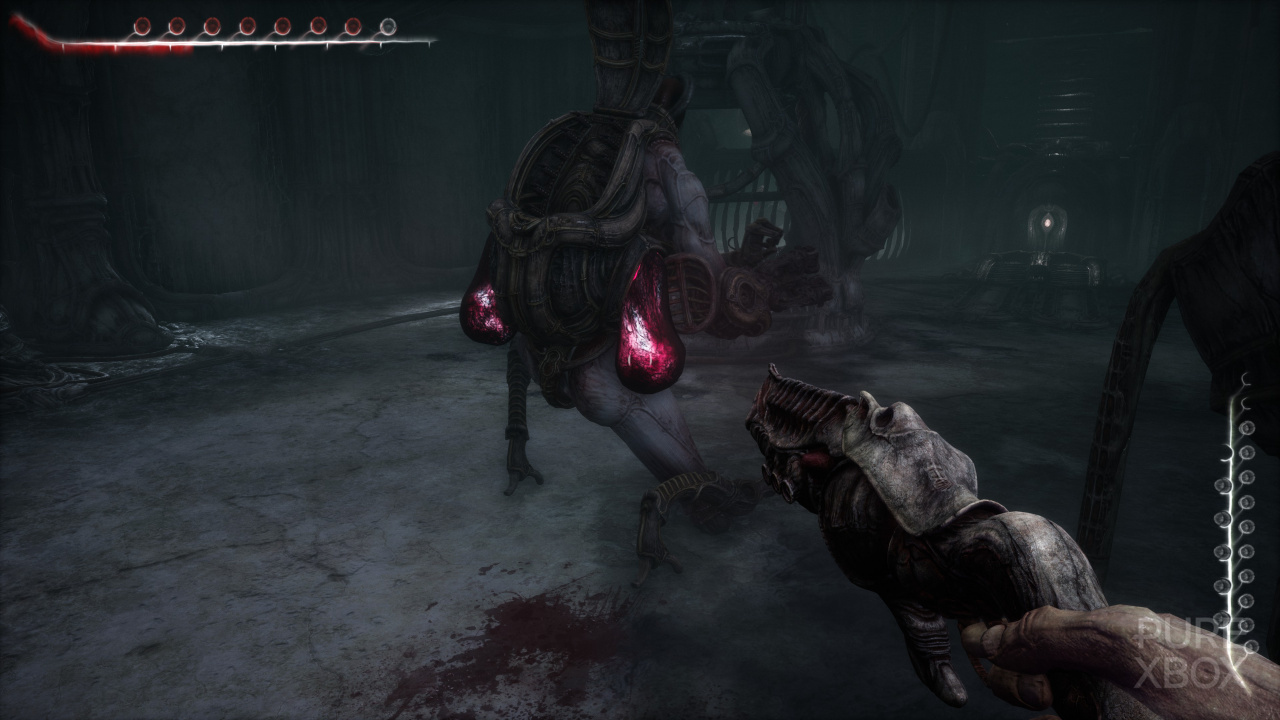
How To Beat Krang, The Final Boss In Scorn
The final boss in Scorn, Krang, is a fairly straightforward scrap, and we're going to help you beat it! The Krang automaton is going to fire off rounds of grenades at you and you want to keep moving around the room, using the two large cages as cover, drawing your enemy’s fire until it needs to stop to reload.

Once it stops to do this you’re going to see glowing purple sacs protrude from its sides and you need to shoot one of these to destroy it, it only takes one shot from your pistol, and then move away to repeat the process. The grenade launcher has around about eight/nine shells per round (it seems to fluctuate) so count them out and prep to get in close to shoot the sacs. The best method here is really to forget the cover and just keep moving, circle around the room without stopping and the grenades should pretty much all miss. Use the cover to heal if you need to. Also be aware that you can draw a painful punch to the face if you get close to our robotic friend.
Once you’ve shot the sacs on its body four times, Krang is gonna go down and this is a good time to reload and top up your health. Now let’s approach the enemy and interact with its launcher, it will reawaken, lift you up and toss you to the ground. The second phase has commenced.
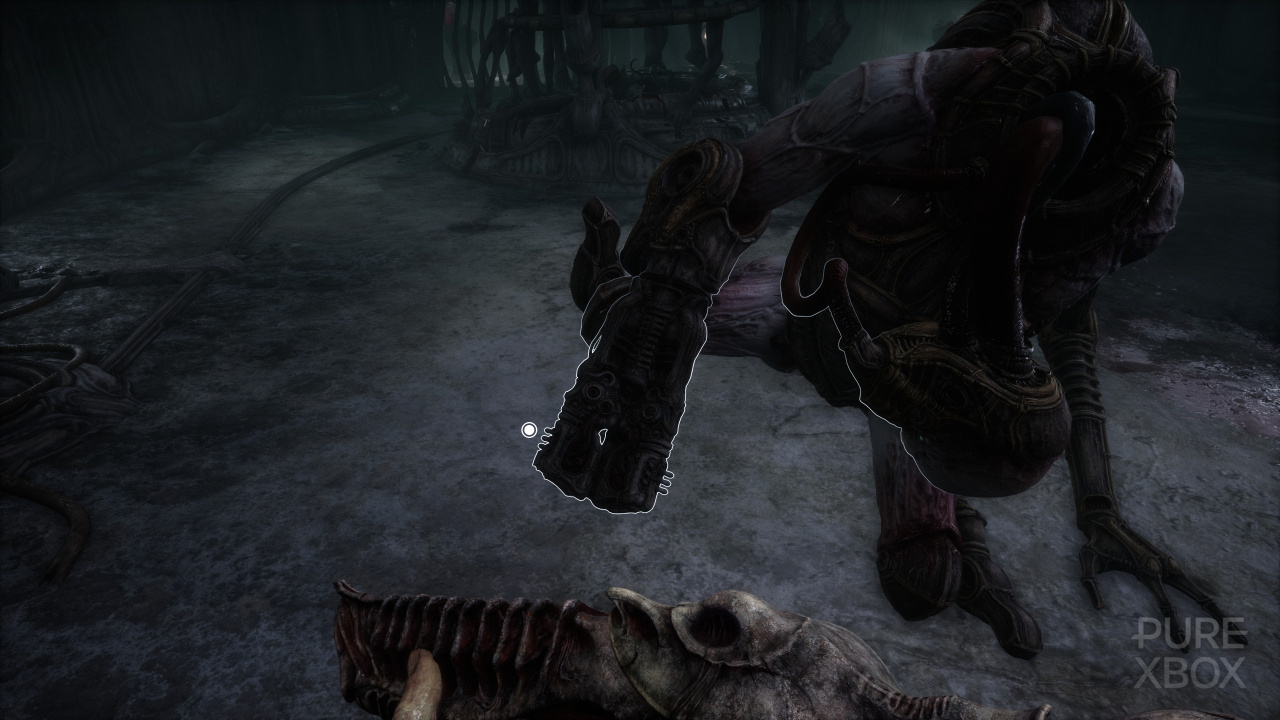
This time around the grenades are going to be fired off singularly so just keep moving around the boundary of the room in one direction. The shots should all miss you and we’re waiting to hear silence after about eight grenades have been fired. Instead of reloading, Krang is now going to approach you. Stand your ground and let it. It’s going to do one of two things here. If you see it winding up its arm, get back, it’s gonna throw a big punch, just move out of the way and go through the grenade rounds again. Otherwise it’s gonna open its core and expose the embryo controlling it, you need to shoot this quickly.
Once you’ve shot the embryo twice, Krang will go down permanently and we can snatch up our disgusting prize and take it out to the console to crush it. Grim. More importantly you’re also going to take the grenade launcher here which boosts our fire power significantly for the final stages of the game.
Take the embryo out to the console at the door and deal with it to half fill your container. Now we need to get the final embryo which is locked behind a gate back in the room where we just had our boss battle. Let’s head back there and stand on the pressure plate to the right side of the room in order to open up a panel on the wall, now fire a single grenade shell in here to open the gate and retrieve the embryo.
Ok, now we’re gonna put this embryo into the other Krang robot in the room, it’s sat right beside the downed body of the first one. Once again prepare for battle here, but thankfully this is a much shorter duel. This Krang is gonna fire off ten shells at you, just stick to the same tactics as before. Then it’s gonna try to reload and as it does it will expose and open ammo cache on its back. Simply fire one grenade shell in here to destroy this robot and grab the final embryo. Easy.
Stick this final grotesquery into the console to fill your container to the top and we’ll head back out to the body in the main room to interact with it. But wait! Hold up. When you go to interact with the console at the body, you can’t due to the growth that’s developed around your hands. Remember the console that damages your health we mentioned earlier on the bottom floor down the stairs? We need to use a machine like this to shear off the growth so you can continue to interact with consoles. Let’s now head back to that area.
Once down here you’ll see another pressure pad straight ahead, stand on it and fire off a shell into the exposed panel to open up a gate. Head on through here and to the right we’ve got a small room with a door, a health station and another machine for shearing off the growth from your hands. Strangely enough, you can still use the health station here so refill and patch up if you need to.
Straight ahead in this area, as shown below, you’ve got another door with five lights and to the right a console that we can’t use yet. We want to open the door off to the left, the one with four lights on it, so let’s use the machine in this room to shear off the growth on our hand and interact with the door.
You’re now in a small area with a pressure pad, stand on it to make the belt above you move and we need to time a shot through the obstacles to the far side of the room. If you need ammo, you’ll find it to your immediate right in an automaton but you’ll need to shear that growth off again to grab it! Keep an eye on your health all through this section. Time your shot to the other side well and you’ll cause an explosion that reveals a final key upgrade machine. Let’s shear off that growth once again and then upgrade our key. Once you’ve done this, shear again and head for the central door with five lights to open it. You’ll need to be quick to get to the door before the growth comes back so remember to use the other shearing machine that’s in the room directly opposite the door, where we first entered this area.
Once through the door, we come to a small little chamber with a machine we need to interact with and, yes, that means it’s shearing time again. Now enjoy a brutally gory cutscene as you climb aboard this machine and take control of an incision device. Place it over your head and press interact to remove the growth from your body, which will then scurry off. No more need to shear anything.
We can now head off to the machine out of this room and to the right. This opens up a gate.
Head down then left and up around to your right to re-enter the building at the main entrance now.
Head off to the left here and down the stairs to reach the room with the two bodies again where we can finally insert our full container off blood. This will take us up a level. Now interact with the metal sculpture directly behind you.
Once it’s done its rather painful job, you’re going to find that there is now two humanoids, the bodies we filled with blood, to control and you can switch between both as much as you like by pressing “X”.
Use one humanoid to interact with the metal sculpture, as shown below, this sees you lift up your previous body to carry to the large doorway that’s in front of you. Switch to the other humanoid now and make your way up to the large room with the door, look to your right and there’s a machine to fit you with a tool which you can use to interact with the central console.
Now switch to the humanoid carrying your body and have it stand on the pressure pad directly at the huge ornate door. Then switch back to the tooled up humanoid and interact with the central console. The door will open and you can now switch back to the humanoid carrying you and make your way forward to the end of the game. Enjoy the final cutscene and congratulations, you just completed Scorn!
Did you find our Act 5 Walkthrough for Scorn useful? Check out our full Scorn guide for more help with completing the game, including all acts and puzzles.


Comments 0
Wow, no comments yet... why not be the first?
Leave A Comment
Hold on there, you need to login to post a comment...