
Need a walkthrough for Act 4 in Scorn? You've come to the right place! In this Scorn guide, we'll reveal how to complete the puzzles in Act 4, and we've also provided images to help you along the way. In Scorn, this part of the game is known as "Act IV", which you'll notice when you go into the save game screen.
This Act 4 walkthrough will reveal how to solve the rotating maze puzzle, as well as how to get the shotgun in Scorn. Let's get started!
Scorn: Act 4 Walkthrough
Head out of the lift and down the ramped corridor, you’ll come to a junction here. Off to the left has a few spitting enemies and then comes to a dead end, so let’s head right. You’re gonna come to a junction here with steps leading off and up straight ahead and a smaller set of steps leading to a large alien’s slimy torso on the left. Let’s head up the steps straight ahead first and interact with the console here.
Using the console will tear a hole in the alien’s torso, we can now head down and enter through the wound we’ve made. Also, be aware that you’ll get attacked by one spitting enemy as you make your way back down the steps here!

Entering the innards of the large alien here you’re gonna come to a console in a room with three separate sections. Our task in this act is to interact with the console in each of these areas, so we need to make two more entry points in the beast’s body. For now interact with the console ahead of you to send the maze puzzle in front of it to the level above. Now, turn around and take the exit out to the immediate left of the ramp where you entered, as shown below.
Once you've exited, keep moving along and follow the corridor around to the left, the steps to your immediate right are blocked. It’s a good idea to sprint down this long corridor to the steps at the very end as there’s nothing here of interest beyond a few enemies who you can get past by keeping moving. You’ll enter a large area with two levels and paths off to both sides, as shown below. The right upper side is blocked, while the left side has a healing station and an upper floor with a door which we need to upgrade our key with another light to enter. Let’s heal up here and backtrack to move to the bottom floor down the ramp.
On the bottom floor, off to the left you’ll find a gate that won’t open until we upgrade our key to four lights, whilst off to the right is blocked off for now. So let’s go straight ahead to the area we’ve pictured below, take either side ramp down to find the maze puzzle you sent up here a little earlier. To the left of the puzzle are step leading up to a higher level, but we don’t need to worry about these right now as this is our eventual exit point and it’s locked at the moment. Let’s head on straight ahead and behind the maze puzzle console.
Keep going straight here and you’ll come to a rack holding your next weapon, the shotgun – or at least a type of alien shotgun – which is a nice upgrade from the pistol. Turning around you’ve got an ammo station on your right, so get loaded up and then, upon leaving this dead end, you’ve got a locked door on your immediate right and so we’ll head off to the left for now. As soon as you start heading down this corridor you’ll come across a large charging enemy, now’s the time to test out your new firepower. Two shots to the head will put this large enemy down. Keep moving along a short way to find a lift going up. Prepare to be assaulted by two small spitting enemies here, just take them out with one shotgun blast before they do too much damage.
Head up the ramp to your right now and keep moving straight ahead, there’s a corridor off to the right up here too but it’s long and leads to a dead end with nothing of interest to see or pick up. Be wary now as there’s another charging enemy and a spitter in the large open space you’ll come to so best to hook to the immediate right and up here as there’s a door over to the left but it’s currently locked. Take the tight ramp up to the right, avoiding the spitting enemy sat at the top and you’re in a small area with another ramp up to your left that takes you to the console we need to upgrade our key to four lights and start opening up some doors!
Head back down to the open space below where the charging enemy is roaming around and get through the locked door here, either by avoiding the enemy or taking him out. Once through the door, head down the corridor and take the first left. Follow the corridor down and around and you’ll come to the console we’ve pictured below. It’s time to make our second doorway in the large beast at the centre of the level. As soon as you’ve done this you’ll be jumped by two spitting enemies, take them out and use the healing machine behind you to get your health bar sorted. Now head straight along and you’ll find yourself back down near the maze puzzle console.
Head down the ramp here and to the left to open up that locked gate we saw a little earlier. It’ll shift the gate over to the left and let us through. Through here and to our immediate right is the entry down into the belly of the beast where we can now raise up our second maze puzzle console.
With that done, head back out and down to the area with the maze puzzle consoles below us, as shown below, head on past these consoles and swing a left to find the other locked door that we saw earlier, we can now open it and head through. Head down the corridor here and take the lift up. Be wary up here once again as there’s a small spitting enemy and a large charger roaming around. You can avoid them both if you take your time, or just kill ‘em if you’ve got the ammo for it.
Switch to your tool weapon and interact with the console straight ahead, pictured below, to open up a gate forward that acts as a shortcut back to the maze puzzle console area. Now turn back and head past the lift you took up here to find a healing station, get topped up. Keep heading this direction and you’ll come to another lift. Take it up and you’ll find yourself in an area with the final console we need to open up the third doorway in the large beast.
Beware here that there is yet another small spitting enemy wandering around. Interact with the console to tear open the final wound on the large beast and then we’re gonna backtrack down the lift we just took up here, but before we do that keep heading around to the left of the console and down the corridor, it comes to a dead end but there’s a sneaky ammo station down here to top up your guns. Sweet. Now head back to the lift and down, watching out for the enemies who’ve spawned along the way.
Now down on the lower level there are also a few enemies to either dodge or kill, if you’re quick you can sprint past them all and head down the third doorway, it’s got a light above it, leading to the third maze puzzle console that needs lifted up into the central console area. With this done, head back to the lift to your right on exiting the beast and head down then over to the central maze puzzle console.
Interact with the maze puzzle console here and you’ll find you can move white light towards a red dot at the centre. However, the way to the red dot is blocked by maze walls so we need to rotate the console using the directional prompt, working on each of the three maze puzzles individually in order to get the white light to the red one.
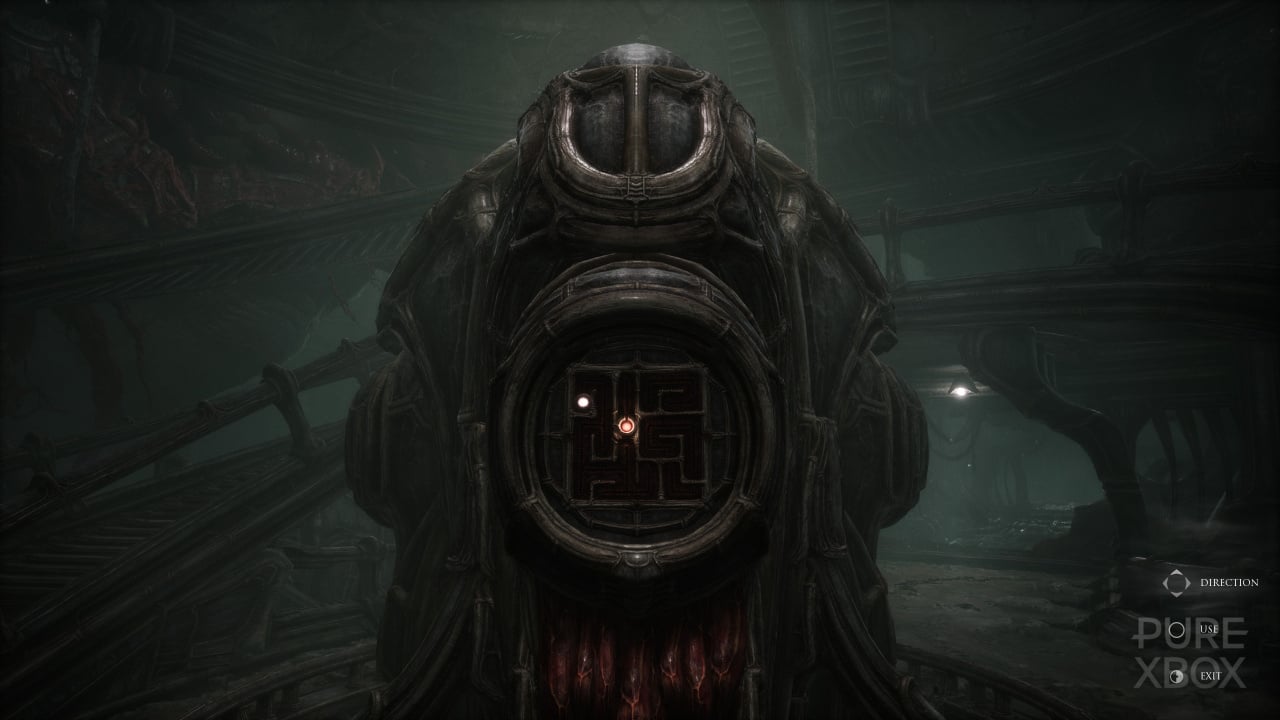
This is a pretty simple puzzle and you’re really doing is moving the light down and then across to the right and up, switching the consoles around every time you come to a block in order to keep shifting the white light to its target. We’ve added some pics below to give you a general idea how to do this one, but it’s fairly easy and shouldn’t take too long.
Once you’ve done this the entire platform you are on will begin a journey upwards. Once it’s come to a stop, head on up the steps to the exit to the left of the maze puzzle console then down the long corridor here. Keep heading along here and you’ll come to a train-like transport device. Step in and let’s ride to the next part of this nightmare shall we? Enjoy the ride and the views.
It's time to move onto Act 5! We're almost there...
Did you find our Act 4 Walkthrough for Scorn useful? Check out our full Scorn guide for more help with completing the game, including all acts and puzzles.


Comments 0
Wow, no comments yet... why not be the first?
Leave A Comment
Hold on there, you need to login to post a comment...