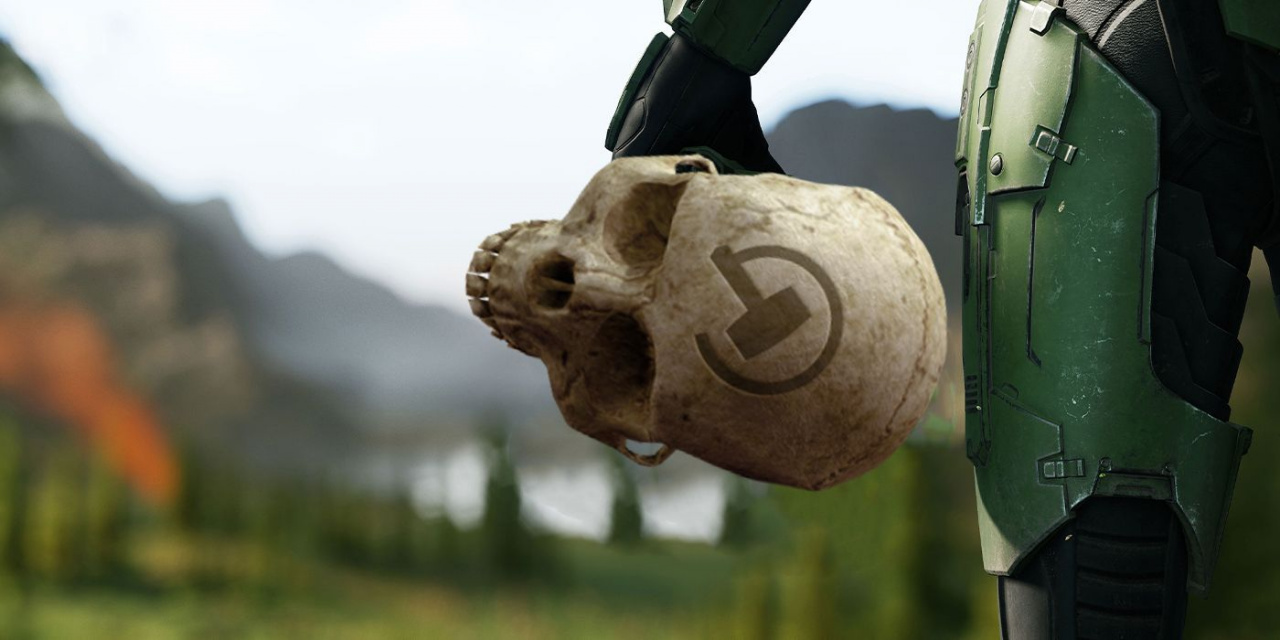
Halo Infinite's hidden skulls are 100% its biggest challenge in terms of collectible goodies, these things are really well hidden throughout the game and pretty tough to find. Each skull you manage to get your hands on adds a fun effect to gameplay, tweaking various aspects of how weapons, enemies and so on behave, that can be switched on and off via the in-game menu.
There are a total of 12 skulls to find in Halo Infinite and they're dotted around story missions as well as across the vast open world of Zeta Halo.
Subscribe to Pure Xbox on YouTube30k
Further to this, there are also a total of three achievements to earn that are tied directly to the game's skulls. These are as follows:
- Headstrong - Discover Your First Hidden Skull
- Catacomb - Discover All Skulls
- Headmaster - Complete All Main Missions On Legendary With All Skulls Active
When searching for skulls, remember to scan areas for the tiny outline of the collectible as well as keeping an ear out for the ominous sound effects and change in audio ambience that occurs whenever one is nearby.
In order to help expediate the process of getting your hands on all of these game-changing artefacts, we've gone ahead and put together a full list of every skull location below.
Note this guide is currently a work in progress and we'll continue to add skulls as we find them over the coming days.
HALO INFINITE - SKULL LOCATIONS
Boom
Effect: Doubles explosion radius
Location:
During the very first campaign mission aboard the Warship Gbraakon you'll come to a room with some moving cargo crates on the right hand side, as pictured above. Go to the middle set of crates we've pinpointed here, the one on the right is stuck, the one on the left is moving. Jump onto the left crate and head up and you'll find the first skull in the game awaits you!
Cowbell
Effect: Increased acceleration from explosions
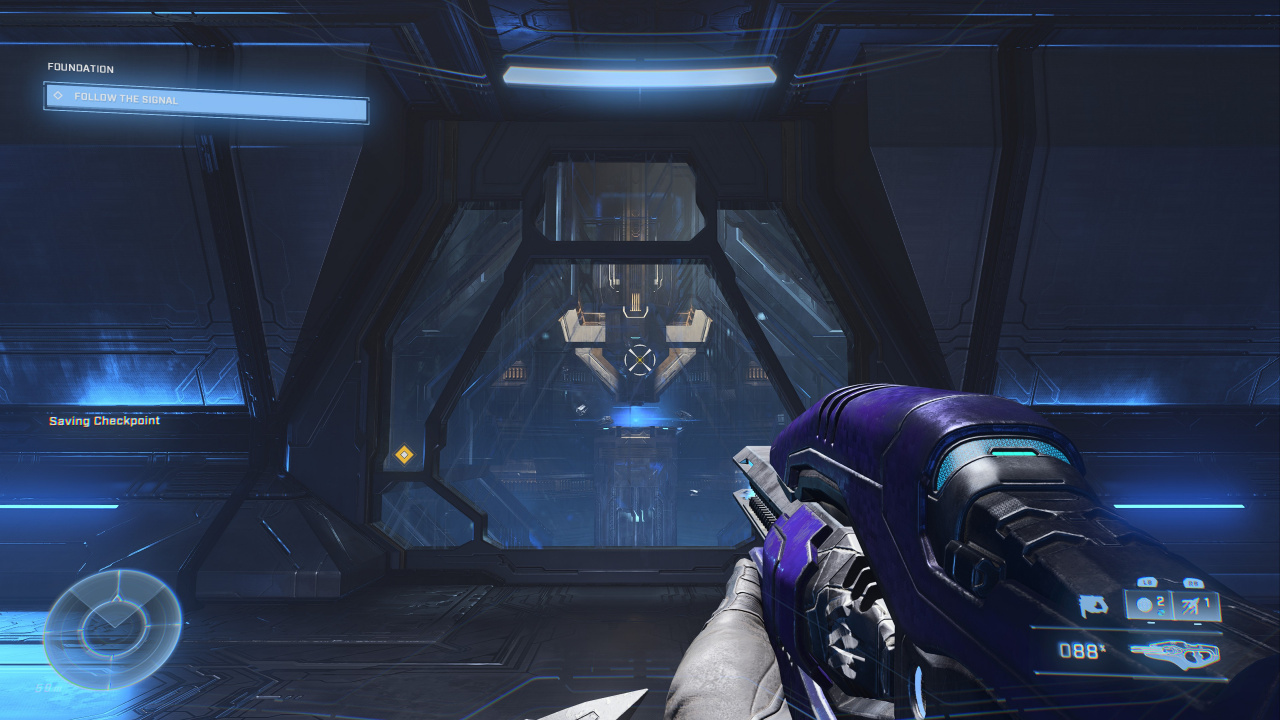
Location: This next one is a bit of a toughie. In the second mission aboard the Foundation, just after you are reunited with the Weapon, you'll walk into a room with a glass viewing panel straight ahead of you, as pictured below.
Enter this room and head left then stop at the first pillar. If you look up and use your scan ability, look exactly where we've got our aiming reticule in the pic below, and you should be able to see the orange outline of the skull sat up high at the ceiling.

In order to get up there you need to use the gaps in the first pillar, grapple up into the top gap and then grapple from there over to where the skull is. This is tricky and it'll take you a few tries for sure, but keep at it and you'll get there!
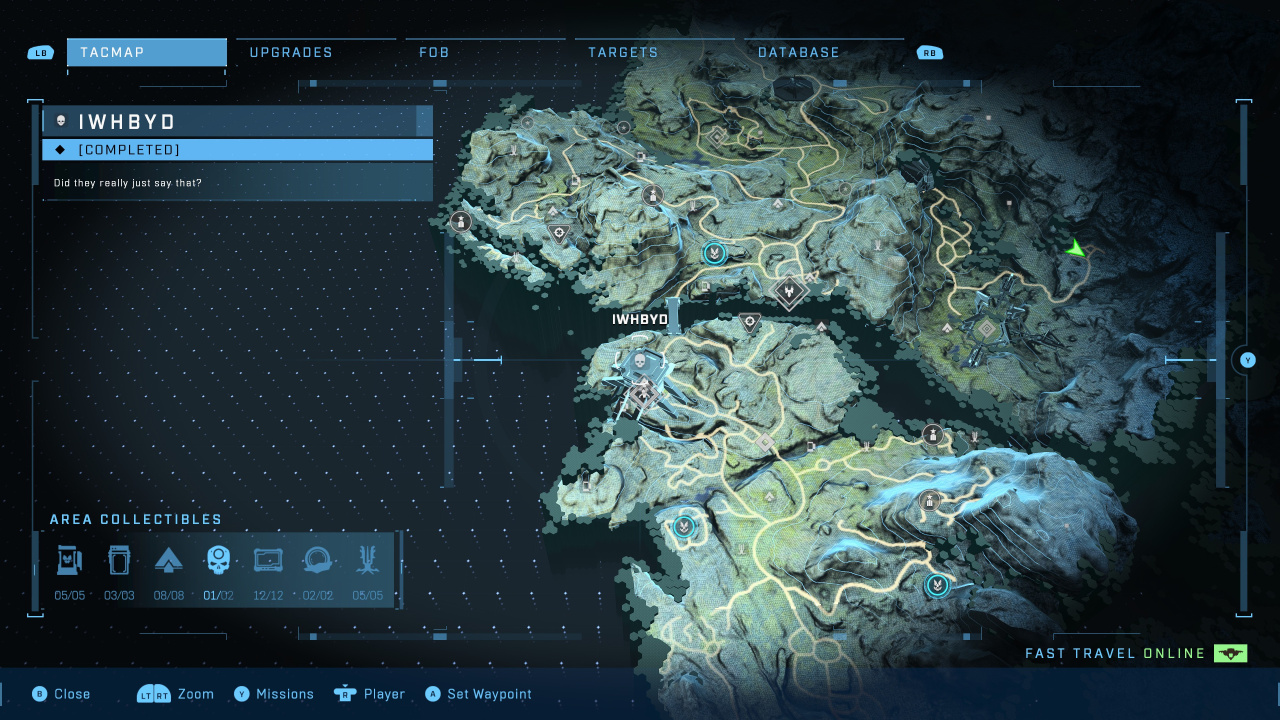
IWHBYD
Effect: Promotes rare NPC dialogue.
Location: This one, which we've likely all seen in online preview videos by now, is located right up on the roof of The Tower complex, alongside a nice memorial to Craig the Brute. The exact location is pinpointed in the map below and you're gonna need a WASP or Banshee to get up there.
Fog
Effect: Disables Motion Radar
Location: Make you way to where we've pinpointed on the map below, then scout around the metal hexagons until you find the doll, also pictured below. From here scan the environment and you'll see the skull's glowing outline, alongside some guns and ammo almost directly above you.
You ideally want to use a WASP or Banshee to simply fly into this little cave above you that houses the skull, but if you don't have either you can pretty easily grapple your way up the columns from where the doll is in order to get there, as long as you've unlocked the first grapple cooldown ability.
Use your momentum to pull yourself up and propel Master Chief into the gaps at the top of the columns and the Fog skull is all yours.
Famine
Effect: Weapons dropped by AI have only half their regular ammo.
Location: On a tiny little island out to the very east of the world map, as shown below. You'll need a WASP or a Banshee to get out here and once arrived you'll find the skull beside the body of a golden armoured elite.

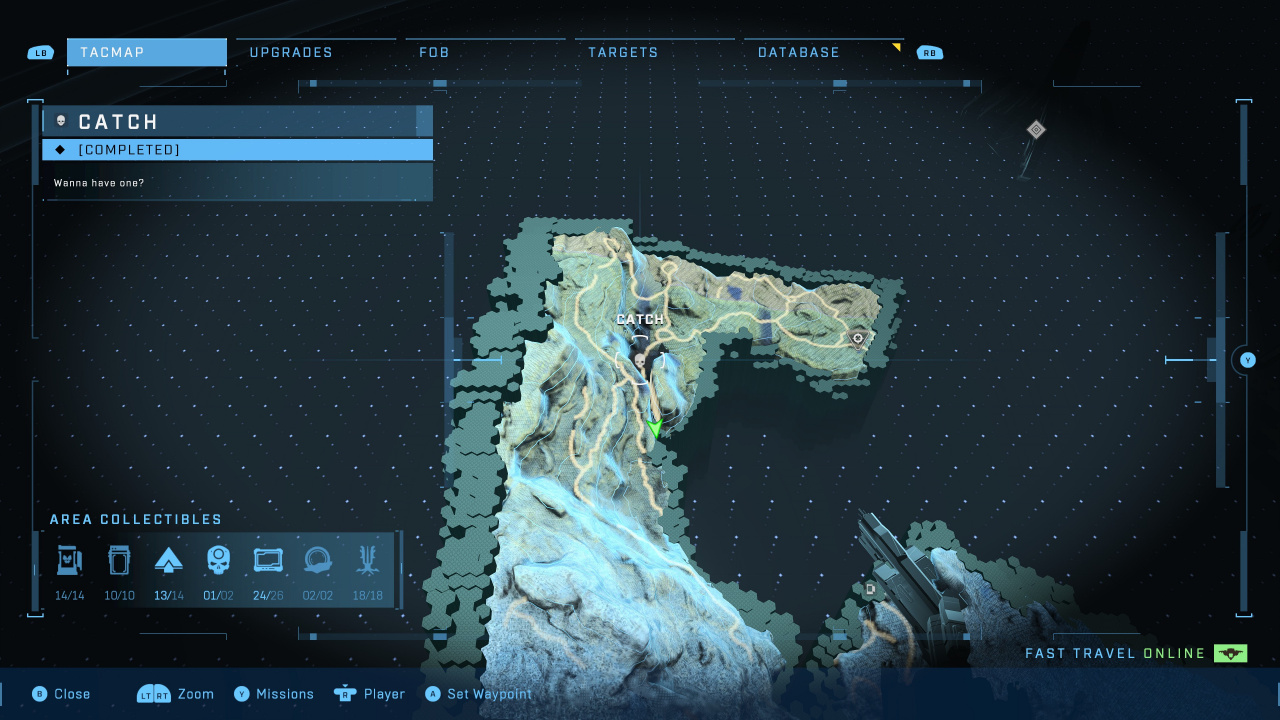
Catch
Effect: Enemies throw more grenades.
Location: Way up north, you'll find this skull sat on a plinth on a path in a narrow canyon in the location we've pinpointed on the map below. Be aware, however, that it's zealously guarded by two rather large enemies.
Black Eye
Effect: Your shield will not regenerate until you hit an enemy with a melee attack.
Location: Get to the area we've pinpointed in our map here and you'll find a waterfall, as pictured below. You're going to need to grapple up to roughly the exact location our aiming reticule is in our second pic and then let yourself slide down the watery rock face in order to find your way onto a ledge where you'll want to crouch down and then move forwards into a hidden cave area illuminated by red lights.
It'll likely take you a few tries to get this right, but once you do you can enter the cave and remove the skull from its creepy plinth.
Blind
Effect: Removes HUD and weapon from onscreen
Location: Head to the exact location we've pinpointed in the map below and look for the knocked over pillars at the edge of the cliff that we've pictured. Once you locate these pillars, walk right out to the edge of the one laying down and peer over the edge.
You'll see faint blue lights making a trail downwards. Jump down carefully and make your way on down until you reach the metal hexagon ledge straight ahead. From here turn north and scan the area, you should see that there's a skull outline showing up on another ledge at your level that you can grapplehook over to in order to grab it.
Once done here it's best to fast travel to the nearest FOB as it's quite a tricky spot to get out of.
Mythic
Effect: Increased enemy health
Location: Campaign mission 11: The Command Spire.
Thunderstorm
Effect: Upgrades enemy ranks
Location: This skull can be found just east of the most northern Beacon complex during the Sequence mission. If you check out our map and pics below, you can see the exact location you need to be in and also the singular tall pillar rising up that has the skull we're after on top of it.
Make your way over to the pillar, it's right beside the largest peak in the area so you should have no trouble finding it, and simply grappleshot your way up the side. One of the easiest skull pickups in the game!
Grunt Birthday Party
Effect: Grunt headshots accompanied by celebrations and confetti
Location: Mission 12: Repository
Bandana
Effect: Unlimited ammo, grenades and removal of ability and equipment cooldowns
Location: Mission 14: Silent Auditorium
You may also be interested in the following Halo Infinite guides: How To Beat Halo Infinite's Bosses, All UNSC Audio Log Locations, All Banished Audio Log Locations, All Forerunner Artifact Locations, All High Value Target Locations which is all available, alongside plenty more, in our Halo Infinite Guides hub.


Comments 0
Wow, no comments yet... why not be the first?
Leave A Comment
Hold on there, you need to login to post a comment...