If you're in the Xbox One Dashboard Preview Program, you'll already have the ability to create and set custom backgrounds on your Xbox One. If not, you'll need to wait for the November dashboard update to roll out to all users.
For those who fancy making their own backgrounds using Adobe Photoshop, we thought we'd put together a little guide to show you how to do it. Depending on which version of Photoshop you have, the options may be in different places, but we're using the latest version, Adobe Photoshop CC 2014 as a reference. The images in the steps below can all be clicked on, so you can get a better view.
(Obviously, you can use any image editing software you wish and you don't need to use the Theming Template. We're just using Photoshop as we have it to hand, and the Theming Template is great for reference. If you're building without it, just remember that your background needs to be 1920x1080 in size.)
Step 1
First off, download the Xbox One Theming Template from here and save it away somewhere.
Step 2
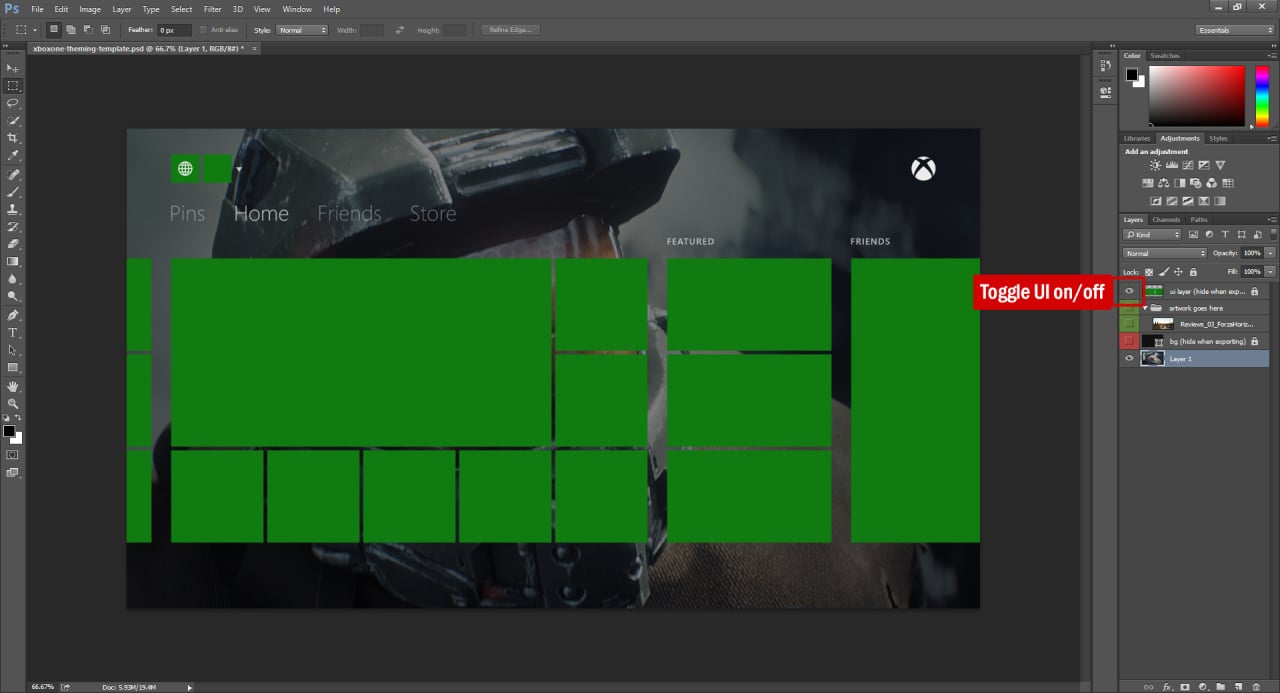
Open up the xboxone-theming-template.psd file in Photoshop, and you'll see that it already comes with a Forza Horizon 2 background.
Head to the visibility controls in the layers panel (indicated above) and click the "eye" icon on all three layers. This will hide everything - the background, the green menu boxes and other UI elements, and the document's black background.
Step 3
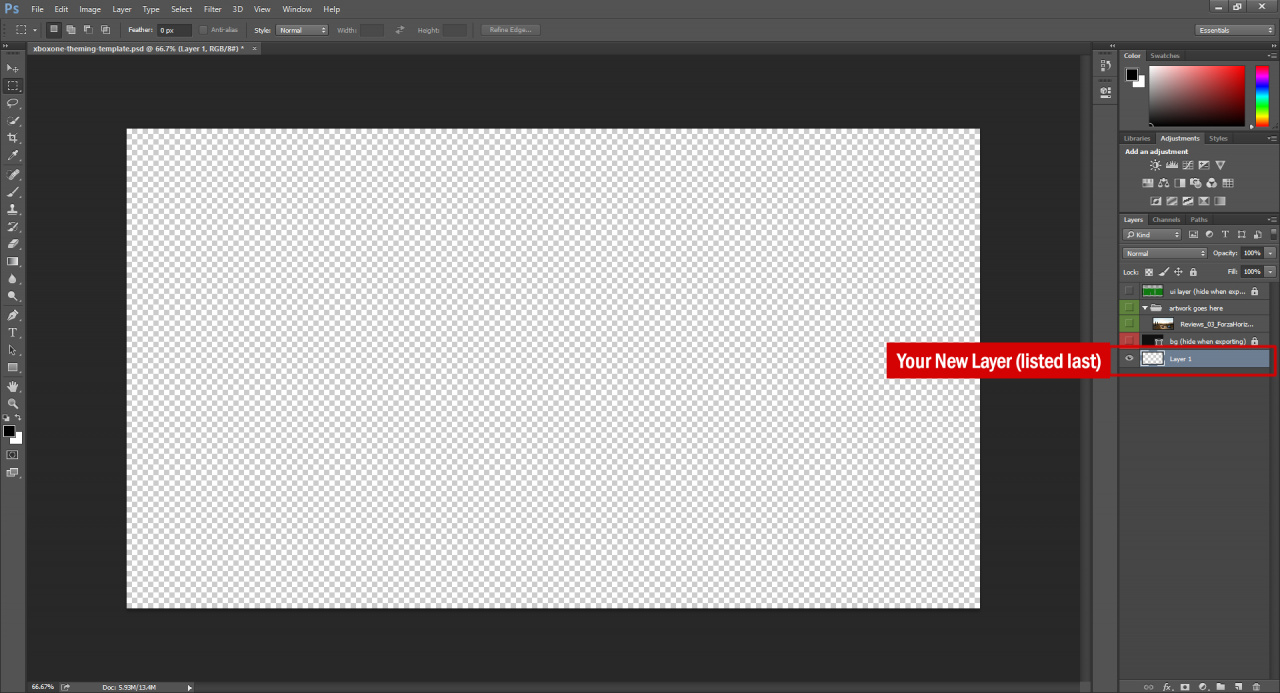
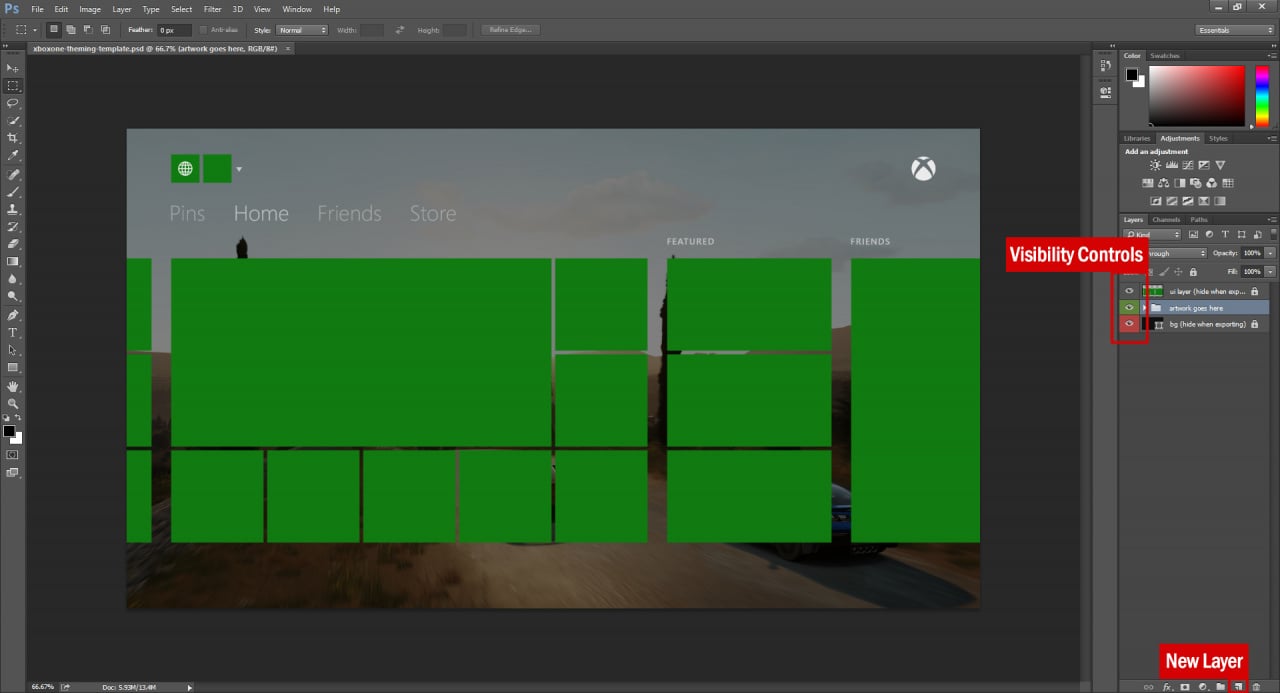
Click on the "New Layer" button and in the Layers panel on the right once again, click and drag the new layer ("Layer 1") down to the bottom of the list, as shown in the image above. This gives you an empty canvas to work on.
Step 4
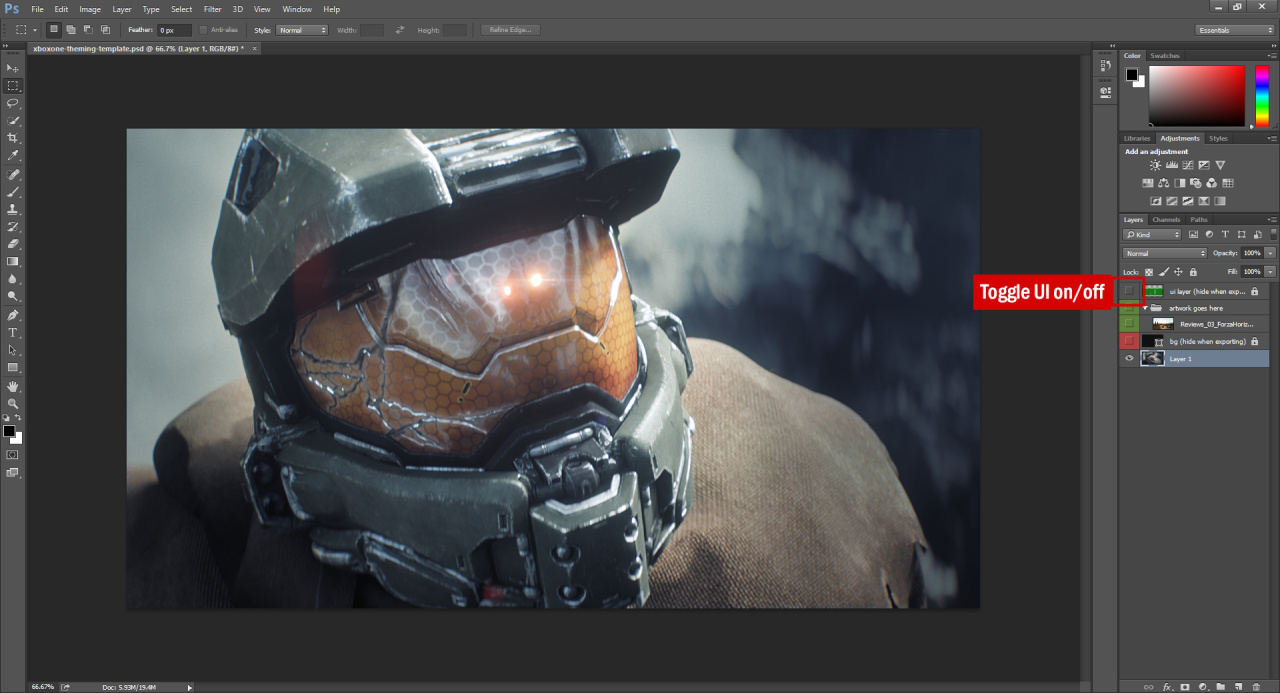
At this point, you'll want to put your new background image in place. We just grabbed a picture of Master Chief from the Halo 5: Guardians trailer from the Internet, and pasted it into Photoshop. This is where you could play around with a few effects in Photoshop, paste in more than one image to make a mash-up, add text, geometric patterns, or whatever else you can think of!
The image size you will need is 1920 x 1080, if you're making a simple background as we are here.
Step 5
Just remember that when you're making your masterpiece, you should check how it looks with the UI layer turned on, as those boxes do take up a lot of screen space. Click on the "eye" icon next to the UI layer in the layers panel (indicated above) to quickly overlay the menu boxes and the rest of the UI over your new background.
If you're happy with how it all looks, you need to make sure that you then HIDE the UI layer once again. Otherwise, those green boxes will be saved with your image!
Step 6
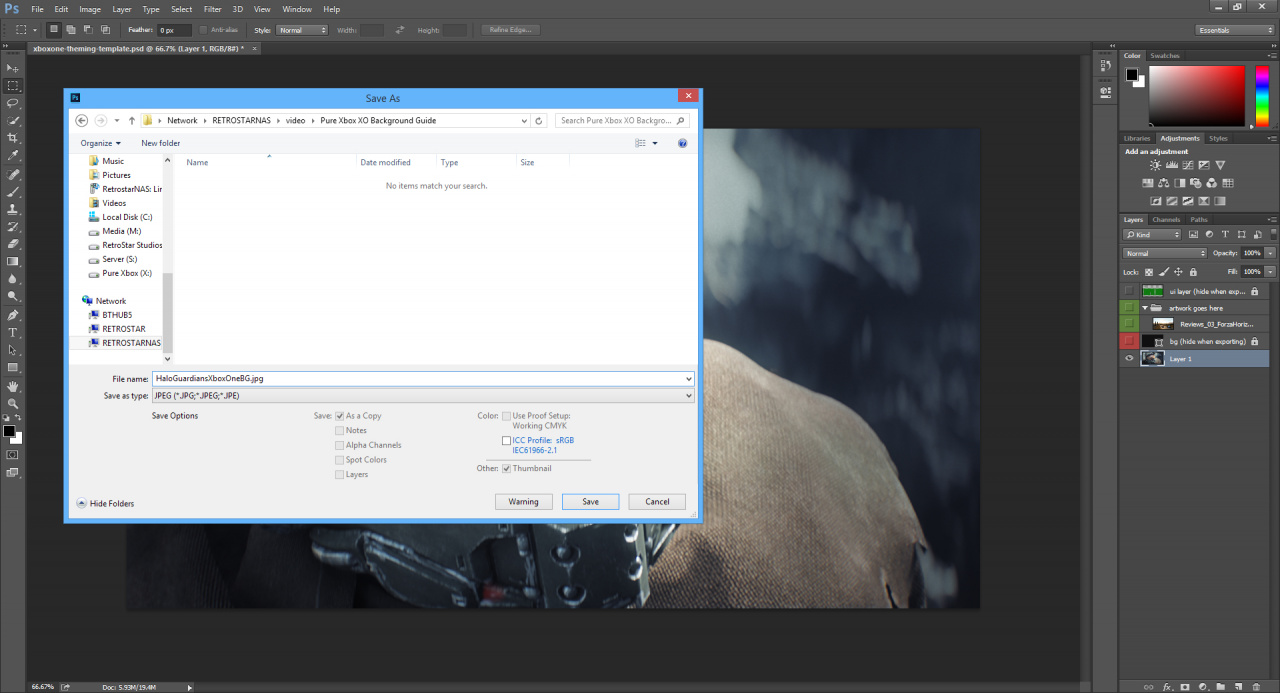
Go to the "File" menu and select "Save as..." in order to save the file away. Choose "JPEG (*.JPG, *.JPEG, *.JPE)" from the "Save as type" dropdown, and don't forget to give it a name. We're saving direct to our DLNA-enabled NAS drive here, but you can save direct to a USB stick as well if that's easier.
Step 7
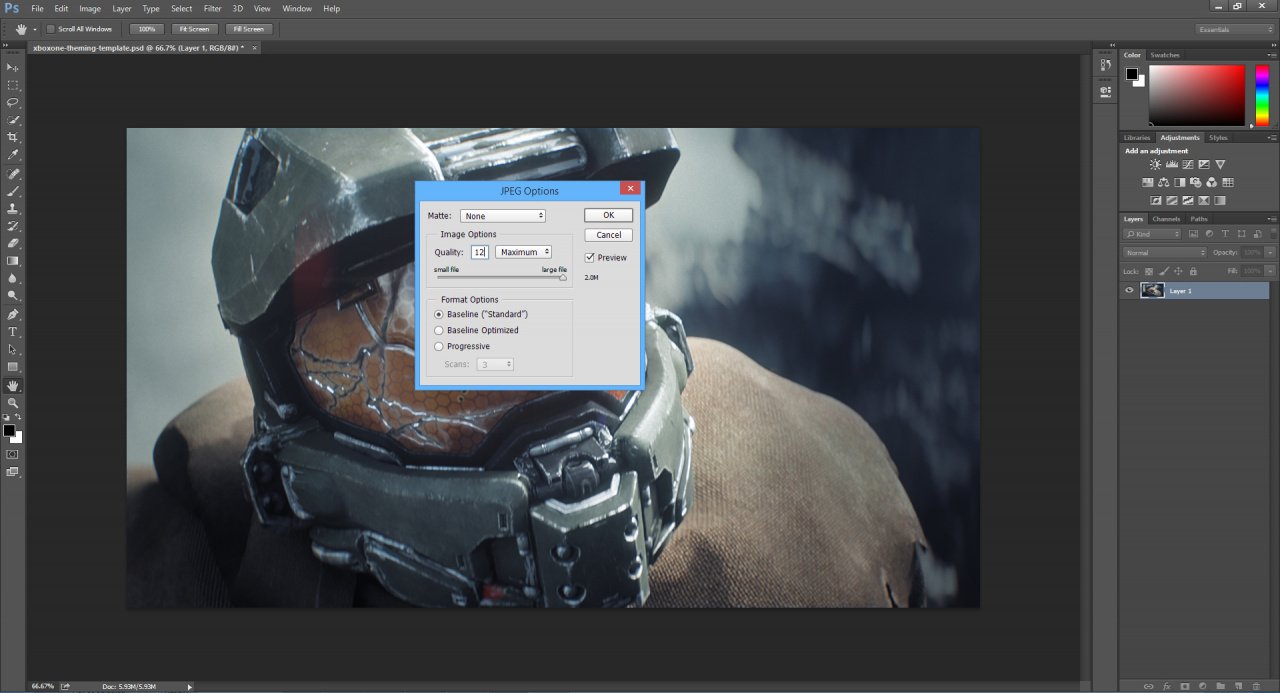
For best results, enter "12" in the Image Quality box as shown. Or just drag the slider all the way to the right. You want the best quality image you can, for displaying on your TV! Hit "OK" and then close down Photoshop.
Step 9
Head to your Xbox One and (if applicable) plug in your USB drive. Open up Media Player and navigate to where you've saved your new background. Open the image, then press the menu button on your Xbox One controller, and select "Set as Background." Close down Media Player, and you're done!
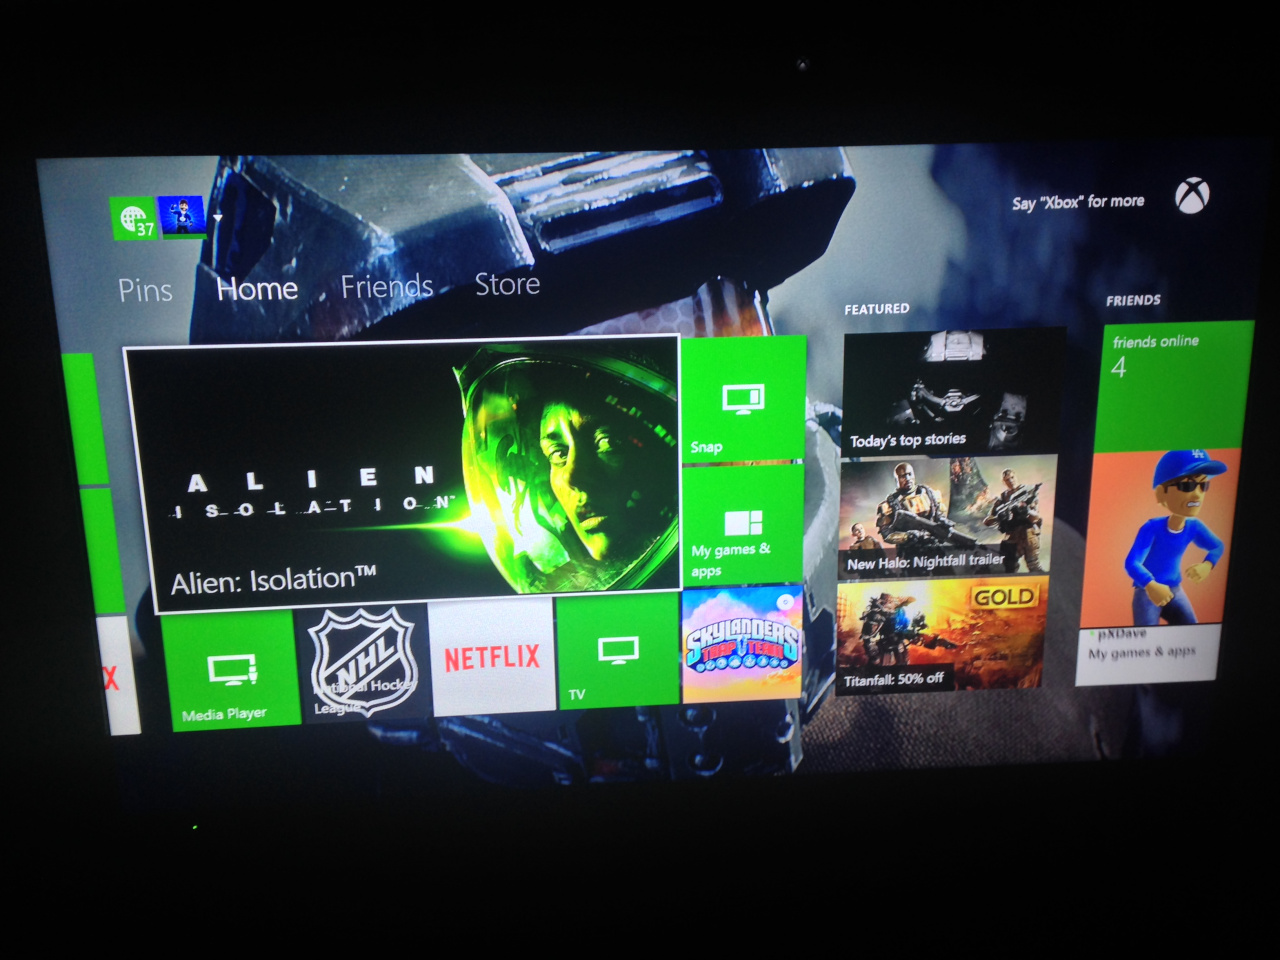
Voila!
We hope that you found this guide useful! We're sure that you can do a lot better than we've done for this simple guide. You can even just grab a 1920x1080 image from the Internet, skip to Step 9, and apply it as it is, without even needing Photoshop. However, with an image editor such as Photoshop and the Xbox One Theming Template, you'll be able to preview the UI, hide it, make tweaks, then preview it again as many times as you like without having to switch to your Xbox One every couple of minutes.
If you come up with something cool, fire it up online somewhere, and link it in the comments for all to see!


Comments 9
I made this bad boy...Very simple. Very clear. I think it works nicely.
Useful guide! Can't wait to see what the community does with the template. I predict some pretty awesome themes coming real soon.
@SuperKMx that looks sweet. Can we use animated pictures like gif or even video such as webm aswell? Or is it just still imagery.
Just still images at the moment, I'm afraid. Don't think animations are on the cards, but hey - it could happen
@SuperKMx dang it, I only ask because my ps4 just got themes and they are all active. This will be the first thing my ps4 will have done better in regards to the UI. Other than that its a pile of dung....bought it for TLOU (best game I've played in years).
@SuperKMx I dont have adobe, can you link your wallpaper into a jpg or png for me to download? I love that clean look. Also if you made any more similar like a blue one. My color is blu on my xb1. Maybe PX can sticky a section for xb1 user created wallpapers
@EternalDragonX Sure thing - Here's the green one I created. http://rewiredmind.com/xobackgrounds/Team-pX-Green-XO-Background.jpg
I think we'll add a topic in the forum for backgrounds, and I'll run up an article with a few variations on the pX theme in the next couple of days.
@SuperKMx Awesome, thank you.
Does anyone have a PSD for the XBOX 360 too?
Show Comments
Leave A Comment
Hold on there, you need to login to post a comment...